Hello everyone! DT member Jana stopping in this afternoon to share a one page 12 x 12 layout I've created using the super adorable "Artsy Fox" file. I have been trying to create some layouts to have ready for my son as he will be starting Pre-School in about another two weeks or so. I know he will be coming home with plenty of arts and crafts projects, and now I have the perfect layout to put some pics of my favorites.
I started off by uploading the Artsy Fox file to my Cricut Design Space and resized all of the images accordingly. Once I was happy with the fox pieces, I then resized the "paper" of the easel to measure 3 x 5 and created my three photo mats. I also resized the paint border and splotches and attached them to the photo mats leaving enough room to be able to slip some pictures under them, so it may look like the paint is splattered slightly over the picture. I also added my title, "My Little Picasso" to the easel by using the writing feature of my Cricut Explore.
Below is a complete list of products and supplies used to create this layout:
Hello, Doodlebugs. DT Twila here today, I'm sharing my latest creation which is part of the New Kadoodle Bug Designs Facebook Challenge going on here:Kadoodle Bug Designs Facebook Challenge.
The theme is Halloween or Anything Happy.
I created this Sonogram box frame using my Cricut Explore and the following SVG cut Files from Kadoodle Bug Designs. These are must haves and have no many uses.
I designed this in Cricut Design Space, and cut out everything with my Cricut. I also made the titles using design space. I cut extra leaves, pumpkins and added a few cute stickers.
I chalked all of my piece edges to add extra dimension and used black and white gel pens to add more detail. This was a super fun project.
This is how I made my tear bear. I cut the pattern out in cardstock and then traced them into mulberry paper. I then hand tore the pieces in two layers and then glued them together. I flipped them upside down and fluffed the edges with a wire brush, hand chalked and pieced together like my other paper piecings. I finished then off by brushing my bear with a soft brush.
I had so much fun making this and thanks for stopping by.
DT Twila here on the Kadoodle Bug Designs Blog today sharing this Tear Bear Card I created with the gorgeous Cutie Katoodle Firework Bear file found here at
I'm telling you these cuties never get old, nor can I ever get enough! :)
I uploaded the pattern to Cricut Design Space and cut out the pieces with my Cricut Explore. I used a process called Tear Bear and created my sweet bear using thick mulberry paper. Totally love this bear!
I attatched this to a base and used decorations I found in the Celebration Stack by DCWV. I added some Jolee stars for embellishment.
DT Shirley here sharing a two page layout I created for my granddaughters using the KaDoodle Bug Designs file, "Sailor Seahorses."
Materials
Cardstock:
Background paper - Dip Dyed by Craft Smith
Glitter Cardstock - Core'dinations
Pearlescent Cardstock - Recollections
Regular cardstock - from my stash
The dip dyed cardstock was used as a background. The seaweed, anchors and spyglass are from pearlescent cardstock. The title, spines on the seahorses, coral, sand, and outer frame on the mats are from glitter cardstock.
The extra seaweed and title are from cricut. The seaweed is 9 inches tall, the seahorse is 4 inches tall, and the title letters are 3/4 inch tall.
The seaweed for this grouping is 5 1/2 inches tall, and the seahorse is 3 1/2 inches tall.
The seaweed grouping here is 11 inches tall, with the coral being 3 inches tall. The seahorse, including the anchor, is 4 1/2 inches tall.
I absolutely love this "Sailor Seahorses" file; it can be used for so many things! Thanks for stopping by. ~ DT Shirley
I'm telling you these cuties never get old, nor can I ever get enough! :)
I uploaded the pattern to Cricut Design Space and cut out the pieces with my Cricut Explore. I used a process called Tear Bear and created my cow using thick mulberry paper.
I attatched this to a base and used decorations I found in the irresistible Confetti Stack by DCWV. Can't get enough to the yummy goodness either.
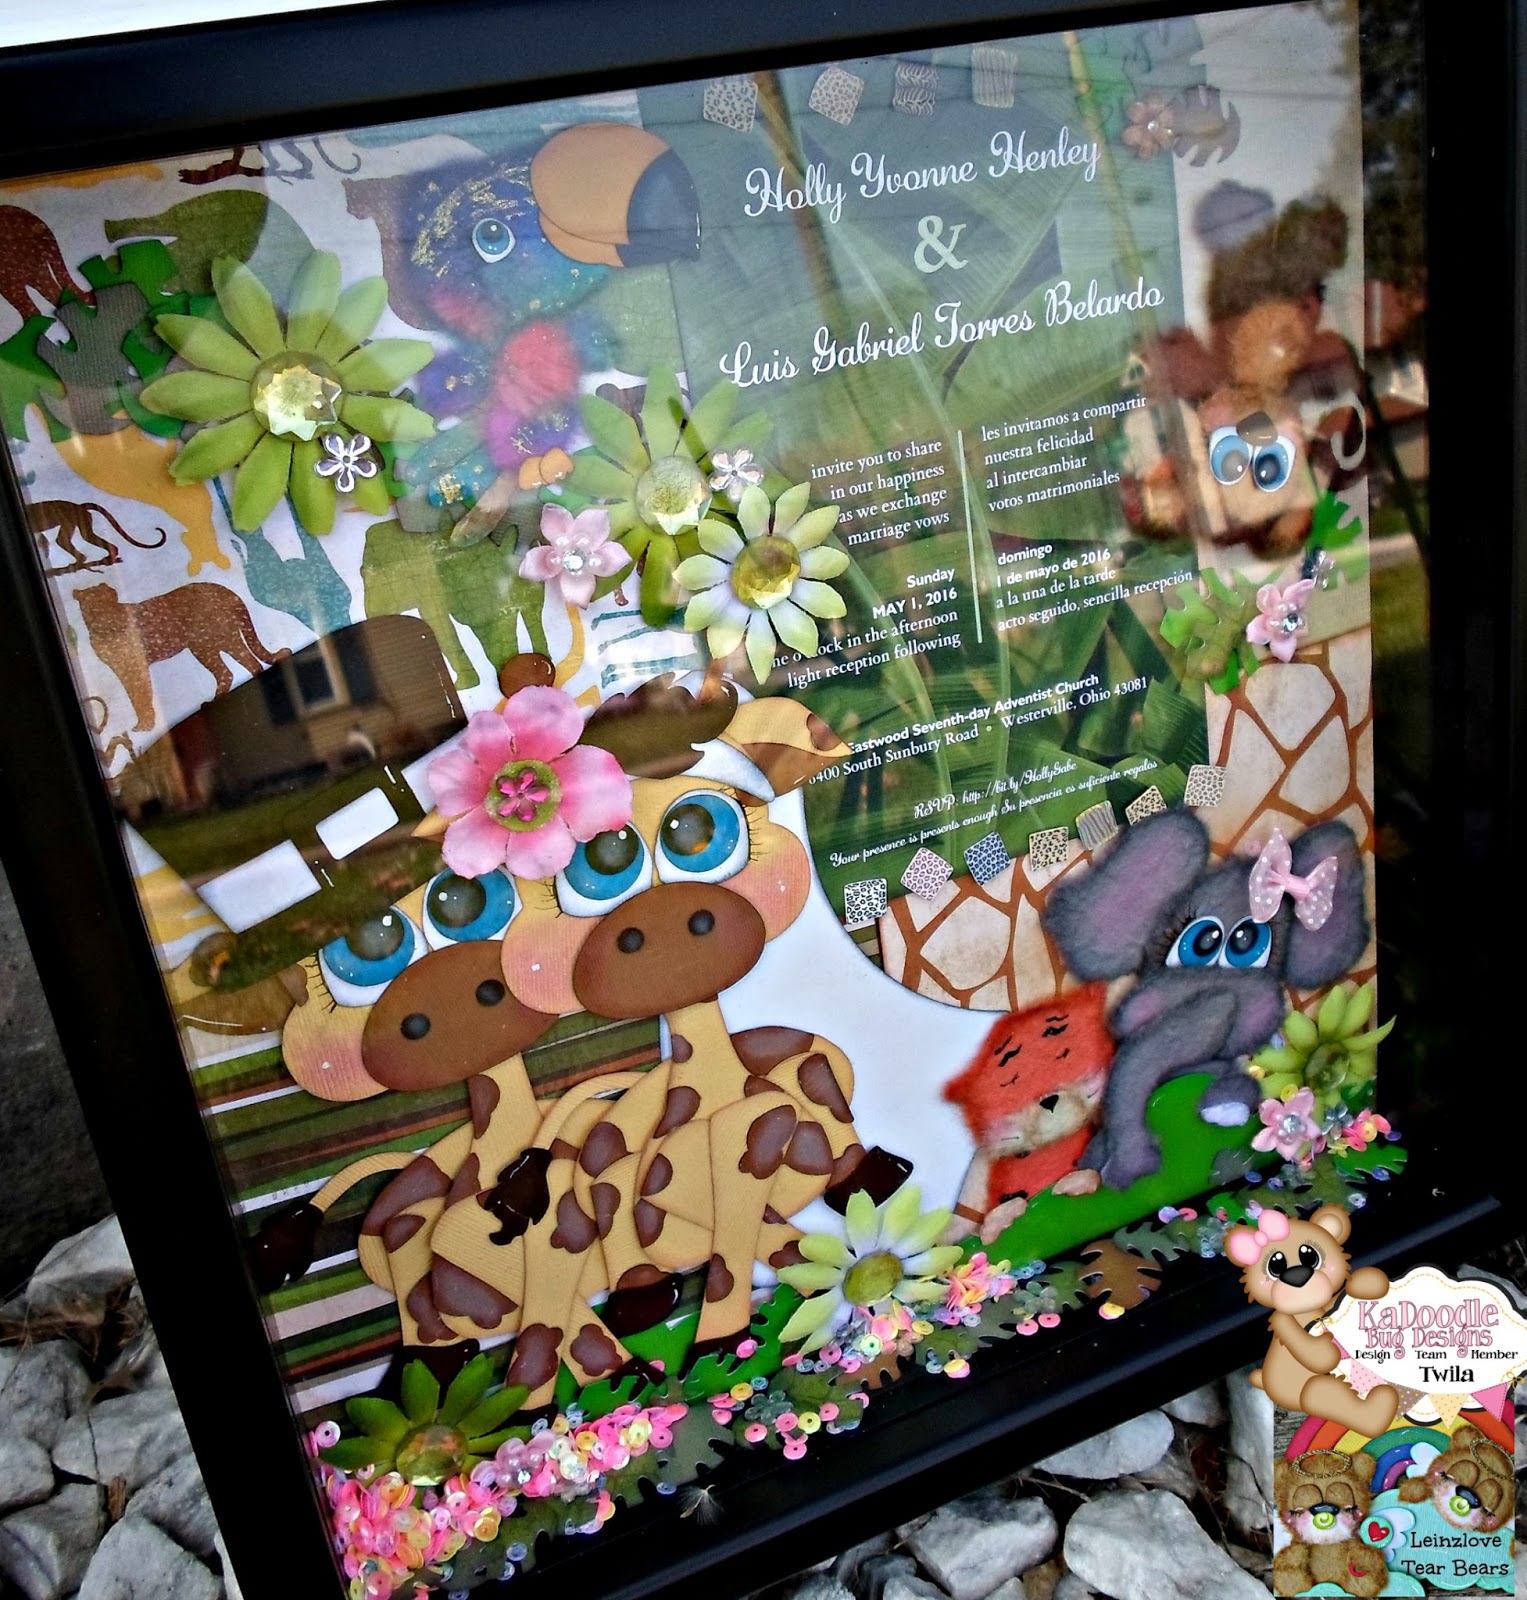
Hello Friends! Today is my day on the Kadoodle Bug Designs blog. I'm sharing this jungle themed shadow box that I made for my best friend. She is getting married this Sunday. I used her actual invitation and then decorated to match it.
I made my giraffes out of cardstock because I needed them big and wanted them to be the main focus of this project. Mulberry paper is best used for 5 inch embellishments or less. My best friends favorite animal is giraffes, so that was an easy choice.
I then added other zoo animals that I made furry using mulberry paper and a process that is called tear bear.
I added green Petaloo flowers and large gems. The background paper is the Zoology collection by Bo Bunny. I used the 6x6 paper pad. I adhered everything to a 12x12 piece of cardstock, put it in my frame and added sequins.
I had a minor problem with sequins falling out of my shadow box frame. I used some tape of the bottom corners to fix this problem.
I uploaded files from Kadoodle Bug Designs to Cricut Design Space and cut out the patterns with my Cricut Explore.
Hi! DT Shirley here sharing a little inspiration for Spring. I made a 2 page layout using one of my favorite KaDoodle Bug Designs files, "Puddle Jumpers" which can be found here:http://kadoodlebugdesigns.com/shop/index.php?main_page=product_info&cPath=23&products_id=718
Cardstock
"Hello Sunshine" and Happy Go Lucky" from Doodlebug Paper
Pink and aqua polka dot from Recollections
Aqua plaid from Core'dinations
The "Hello Sunshine " cardstock was used for the background. I cut a 9 1/2 inch scalloped circle from the pink polka dot cardstock and cut it in half. I actually traced an 8 1/2 inch lid for the circle so I could place it on the rainbow paper the way I wanted it. I only needed to trace half a circle for each side. The largest wavy border varies from 3 to 4 inches wide, and was cut from the aqua polka dot cardstock. I made it by welding two different wavy borders together. The other border is 1 3/4 inches wide and was cut from the aqua plaid cardstock . The mats on the first page are 4 by 5 inches and 4 by 4 1/2 inches. The mats on the second page are both 4 by 5 1/2 inches. The mats have a pink polka dot bottom layer and a aqua plaid top layer.
The above image was made 5 inches tall. The title measures about 2 by 4 1/4 inches.
The above image is 4 inches tall, the boots are 2 1/4 by 3 1/2 inches and will contain some simple journaling. The sun, from another pattern, is 2 3/4 inches. I hope you enjoyed my layout, and thank you for stopping by. We love to hear from you! ~ DT Shirley
Hello DoodleBugs! DT Twila on the Kadoodle Bug Designs blog.
Today, I'm sharing this layout page that I made using the super cute Shoptastical Cutie Pear files found here at Kadoodle Bug Designs.
I uploaded the svg cutting files into Cricut Design Space and cut out the pieces with my Cricut Explore. I took these pieces and traced them into the back of mulberry paper and then hand tore them. I then flipped the pieces upside down and brushed the edges on my bears to give them a furry look. I then assembled my pieces as you would any other paper piecing after inking my edges.
I made my base using a 12x12 sheet of DCMV cardstock. The mats are cardstock from Bo Bunny. I added gorgeous green flowers by Petaloo and attatched sprinkles to their centers from Doodlebug Design.
I just love these Shoptastical Cuties! And can't get enough of their cuteness! Thanks for stopping by today.
Today I am sharing an Easter cross that was made with the pattern, "CK Easter Lamb" which can be found here: http://kadoodlebugdesigns.com/shop/index.php?main_page=product_info&cPath=24&products_id=1069
MATERIALS
13 inch tinsel cross (I got mine from Dollar Tree)
Fleece in white and gray
Glitter cardstock in pink, blue, purple, yellow and green
Cardstock in white and black
Paper flowers in pink, purple and blue
Ink pads in black and gray
Chalk in white and pink
Fine tip black pen, white gel pen
Glue gun, liquid glue
I sized the sash so it had a 3 inch opening at the top to accommodate the cross, and sized the moon to 6 3/4 inches. The rest of the pieces were sized together so the lamb is 7 1/2 inches tall. After the lamb pieces were cut out, I traced them upside down on the fleece being careful that the fuzzy side of the fleece would face up when I put the lamb together. I cut out the fleece pieces and glued them to their corresponding paper pieces using plenty of liquid glue. When they were dry, I fluffed the pieces with a toothbrush, then inked the edges. I assembled the lamb on the base layer which had been trimmed so it only included the lamb, flowers and grass. When finished, I chalked the eyes and cheeks and put white highlights in the eyes and on the nose. Using the fine tip black pen, I gave her some eyelashes.
While the lamb was drying, I attached the sash to the cross using a glue gun. I traced the moon onto cardboard, cut it out, and glued it to the moon, then glued this reinforced moon behind the cross as shown.
Using the glue gun, I attached the lamb to the left side of the cross so he is hugging the cross. I added extra paper flowers along the bottom.
Try this fun project! It looks really great in person!
Hi everyone! Twila, here on the Kadoodle Bug Designs Blog.
I am sharing this super sweet Angel Baby Tear Bear Card.
I created this with the super Cutie Katoodle Angel Bear svg cutting file found here.
Instead of leaving her eyes open, I made them closed using the super Cutie Katoodle Sleeping Angel Bear found here.
I made my Angel Bear fuzzy and soft by using the tear bear method. I uploaded the pattern to Cricut Design Space and cut out the pattern and accessories with my Cricut Explore.
I traced my pattern pieces into the back of mulberry paper. Took a water brush to their outline and tore them out. I brushed the pieces with them turned upside down and chalked the edges with Colorbox Chalk, Chestnut Roan.
I assembled with Fabri-Tac. My go to adhesive.
The background paper is from Doodlebug Design, the clouds are cut from two scoops cardstock by Bazzill.
Today I'm sharing my first post as Kadoodle Bug Designs DT. I made this Album for my daughter and can't wait to add pictures, notes and little mementos.
This holds 11 pictures and has 4 pockets. It makes the perfect keepsake.
I created this using the following files in Cricut Design Space. They were cut with my Cricut Explore. (feel free to have them, type the URL in your browser. :)
I cut everything with my Cricut Explore and gathered up all of my supplies. I added a toilet paper roll that I would cut down and glue my tear bear to, so that it would stand up.
I used super cute papers from Doodle Bug Designs and the Halloween Recollections Cardstock pad.
I didn't plan on using all this, but I wanted plenty of fun decorative choices for my mini Scrapbook Album Embellishments. These items made me more excited about working on this project.
These items were used to make my Tear Bear. (AKA: My Go to Leinzlove Tear Bear supplies).
I chalked each of the box layers around the edges, I placed double sided tape under the two middle layers to create pockets. I then taped the smaller middle layer too the bigger middle layer.
I chalked each of my photo mats and used a photo mat to wrap the bottom of the toilet paper roll. I glued it onto the roll and cut it down to where the paper begin. (Approx. 2 inches)
I then glued all of my layers together, just in the center. I also added my photo mats leaving room for my embellishments.
After I finished my box base. I made my tear bear. I traced each piece of my tear bear into mulberry paper. I used my water brush to outline each of the pieces and tore them out.
After my pieces were dry. I flipped them upside down and took a wire brush around the edges of each piece.
I hand chalked each piece around the edges using Colorbox flower petal in Chestnut Roan.
Supplies I used for my Tear Bear Katoodle Bear Eyes.
My Bear was small about 2 1/2 inches tall... So, I decided to make the eyes before putting them onto my tear bear face.
I then assembled my bear and added a pacifier and a baby blanket to make him fit my Halloween Baby theme. I took a soft brush and brushed this bear.
I hand chalked and assembled all of my pieces. (I previously cut these with my Cricut Explore.)
I then attatched my bear to my decorated toilet paper roll piece, added my title and all of my embellishments. These stickers are from K& Company, I also added sequins.
The outside of the box features more embellishments and a cute black ribbon.