Current Challenge

Showing posts with label 3d embellishments. Show all posts

Friday, September 23, 2016

Fabulous Fall Challenge

Hi KaDoodlebugs!Today is the start of a new Facebook challenge called "Fabulous Fall."  You can create  anything you like as long as it is fall themed, so grab your favorite fall files and get creative!


For my "Fabulous Fall" project I made a 12 inch fall wreath using these adorable files.


I used an 11 1/2 inch tag board ring as the base of my wreath. I cut about thirty 3 to 4 inch leaves enlarged from the files used. This was a good way to use up all my fall colored scraps of paper. The squirrels are about 5 inches tall and each acorn is about 1 1/2 inches. I made the 7 by 3 inch title in design space. I used three, 1 inch pieces of 1/4 inch wide ribbon to make a hangar. This was a fun, easy project.


Thanks for stopping by. I can't wait to see all the great fall projects you all make!


Thursday, August 25, 2016

Lou Lou Sew Crafty


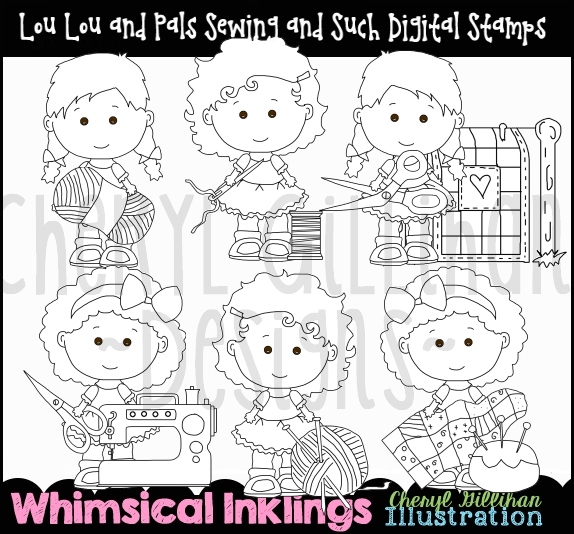
Hi Doodlebugs! Today is my day to share on the KaDoodle Bug Designs blog, so I decided to use the adorable "DS Lou Lou Sew Crafty" file. I am really loving the new digital images by Whimsical Inklings!

DS Lou Lou Sew Crafty


My sister is an avid sewer and quilter so I decided to make some projects for her. The "DS Lou Lou Sew Crafty" images were the perfect accents for my projects.


I printed my images on Spectrum Noir Cardstock by Crafters Companion. The images range in size from 3 1/4 inches to 4 1/2 inches. I used my Spectrum Noir Alcohol Markers to color all the images. 


If you would like all the details of my projects, check out my blog at: www.scrappysamdesigns.blogspot.com

Thanks for stopping by and Happy Crafting!


Wednesday, May 11, 2016

Seashell Narwhal Easel Card


DT Shirley here sharing a little easel card with you today using the super cute file, "Seashell Narwhal" which can be found here:  http://kadoodlebugdesigns.com/shop/index.php?main_page=product_info&cPath=60&products_id=1127


MATERIALS

Shimmer Cardstock by Recollections in aqua and green
Glitter Cardstock by Core'dinations in red, dark pink, orange, teal, purple, yellow and tan.
Plain cardstock in gray, light blue and black.
Various sized white pearls.
Three orange gems (optional for flower accents).
Glue, tape runner, foam tape.
Inks and chalks for accents on paper piecings.


I created the base for my easel card in Design Space by welding the blue pieces of the shell together as seen here.


I created the base in this order: 

1. The smaller blue shell piece flipped horizontally.
2. The larger blue shell piece flipped horizontally.
3. The smaller blue shell piece flipped horizontally.
4. The smaller blue shell piece in original orientation.
5. Line the pieces up one over the other so they overlap slightly as seen in my screenshot, then weld them together.
6. Add fold lines at the halfway point and the mid point of the bottom section as shown.
7. Size this base piece to 8 1/2 inches tall.
8. I manipulated the pink so it would fit into the bottom section. It is 1 3/4 inches by 4 3/4 inches. This will be the piece where you will glue the sentiment.

The base was cut from aqua blue shimmer cardstock by Recollections.

I sized my paper piecings so they fit nicely on the card base. Mine is 6 1/8  inches tall by 6 1/2 inches wide. The sentiment is from Cricut and is 1 1/4 inches by 3 inches. The shell pieces, sand coral and sentiment are cut from glitter cardstock by Core'dinations. The base layer was cut from the aqua shimmer cardstock and the seaweed was cut from green shimmer cardstock by Recollections. The narwhal is cut from regular cardstock and attached with foam tape.

Side view


As a final touch I added five various sized pearls in a swirl starting about one inch above the sentiment. The large pearls are what will support the card when it is open. Three small orange gems were added to the flower.


I hope you enjoyed my project and thanks for stopping by. ~ Shirley

Thursday, March 10, 2016

Easter Lamb


Today I am sharing an Easter cross that was made with the pattern, "CK Easter Lamb" which can be found here:
http://kadoodlebugdesigns.com/shop/index.php?main_page=product_info&cPath=24&products_id=1069


MATERIALS

13 inch tinsel cross (I got mine from Dollar Tree)
Fleece in white and gray
Glitter cardstock in pink, blue, purple, yellow and green
Cardstock in white and  black
Paper flowers in pink, purple and blue
Ink pads in black and gray
Chalk in white and pink
Fine tip black pen, white gel pen
Glue gun, liquid glue

I sized the sash so it had a 3 inch opening at the top to accommodate the cross, and sized the moon to 6 3/4 inches. The rest of the pieces were sized together so the lamb is 7 1/2 inches tall. After the lamb pieces were cut out, I traced them upside down on the fleece being careful that the fuzzy side of the fleece would face up when I put the lamb together. I cut out the fleece pieces and glued them to their corresponding paper pieces using plenty of liquid glue. When they were dry, I fluffed the pieces with a toothbrush, then inked the edges. I assembled the lamb on the base layer which had been trimmed so it only included the lamb, flowers and grass. When finished, I chalked the eyes and cheeks and put white highlights in the eyes and on the nose. Using the fine tip black pen, I gave her some eyelashes.


While the lamb was drying, I attached the sash to the cross using a glue gun. I traced the moon onto cardboard, cut it out, and glued it to the moon, then glued this reinforced moon behind the cross as shown. 

Using the glue gun, I attached the lamb to the left side of the cross so he is hugging the cross. I added extra paper flowers along the bottom.
Try this fun project! It looks really great in person!

Happy Easter! ~ DT Shirley

Thursday, January 28, 2016

Angel Bear 5x5 Tear Bear Box Frame


Hi Doodlebugs, Twila here on the Kadoodle Bug Designs Blog. 
 
I made this cute tear bear with patterns from Kadoodle Bug Designs found at the following links.
 
 
I unzipped the svg cutting files and pasted them on my computer in a new folder. I then uploaded the svg files to Cricut Design Space and cut out my patterns for my tear bear with my Cricut Explore. I also cut the daisy flower, Angel Wings, Halo, clouds and the box frame.
 
Speaking of the box frame. Its just a regular square box lid fit and cut using the score line in Cricut Design Space. This box is on the Tags, Boxes and More 2 Cartridge.
 
I tore my bear out of mulberry paper using a process called Tear Bear. I then chalked all of my pieces with Colorbox chalk and added details using black and white Signo gel pens.
 
For my box frame I used cardstock from Doodlebug Designs.
 
I made this custom for a friend.


 Thanks for your visit today!